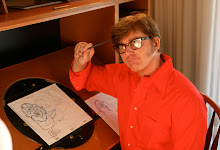
Kaspar sits up quickly, wide awake and excited. This is the first couple steps I would expect a layout artist to take when translating my storyboard poses to layout. First-to understand what the character is doing and feeling, and second to analyze how to construct that sensibly and fix any mistakes in the rough. I fixed the nose.
I, like most people did tone down the pose a bit, but that's because I was spending brainpower slowly analyzing everything.
What I normally do, is after I analyze a drawing and make something stiff, I will draw it again looser. Then judge it to see if it is as strong or stronger than the storyboard statement.
This was a tricky one below.
Kaspar is rooting through the sock drawer. He is being sneaky and doesn't want to get caught, so he looks over his shoulder to see if he is waking up the Rangers. Again, I toned down some of the proportions (face to body) but I also fixed some scribbly parts. I made the feet more solid.
By flattening them at the bottom, and bulging them at the top.
I have puposely left out details, like fur and stuff because it confuses everyone.
I wanna see everybody get this far:
Make the emotional story statement. Solid construction. Fix obvious mistakes. Maintain angular curves (don't make all the curves even or parallel)
I tried to do a more elaborated analysis after i saw the ones that Paul and Pedro had made.
I have not watched this show, so I don’t know what it is really about, but I will try to focus on reading the image.
I want to do a caricature of these guys, but first I will analyse the image and draw it realistic.
EMOTIONAL STATEMENT :
Two guys are sitting on a table. I will call them the ‘thin guy’ and the ‘fat guy’.
The thin guy has a pizza and the fat guy a plate of salad. The fat guy is kind of mad, it seems that he wants the pizza, or maybe he just desagreeing about what the thin one is saying.
The fat guy has both hands on the table and his head is inclined in the direction of the thin guy with an unfriendly expression in his face. I think this helps to give him the agressive look.
The thin guy has his shoulder moved up and both hands are in the air… like he is explaining something to the other guy. His face is very funny and his body is inclined backwards.
As I said, I haven’t watched this show, but reading the image I would guess that they are talking about food… and the fat guy is not happy because he got salad insted of pizza… but I can be wrong.
VISUAL CONTRASTS :
-OBERVATION 01 : to use the ‘HIERARCHY’ principle we can fit them in a larger and simple shape. Doing this we slice the image in 3 parts, the most important is the one in the midle, where we find our characters.
-OBERVATION 02 : going ahead with the hierarchy principle I separeted the larger slice in the midle in two more complex shapes that will help me to get their silhouettes and the negative space between them.
-OBERVATION 03 : their axes are inclined in opositte ways, creating a ‘V’ shape. Their forehead, eyes, nose and chin are at the same level. I think this will help to draw both guys with more accuracy.
-OBERVATION 04 : -CURVES- I found some ‘S’curves in their axes and also ‘C’ shape curves in both their shoulders and hands.
-OBERVATION 05 : secundary elements… Moving the attention from the main characters we find the pizza box, the plate with salad, one chair in the foreground and a door in the background (that gives us a good negative espace of the characters).
DRAWING :
After analyse the picture I started to draw the realistic version of them.
-STEP 01: I made a basic and simple shape that could fit both of them and divide it into more complex shapes that could give me something similar to their silhouette.
-STEP 02: I started to make the structure of the characters, finding the areas that were more important to the expression (eyes, nose, mouth) some information of the clothing etc…
-STEP 03: I checked the scketch with the original picture… AHHH… it was very different. Both heads were out of place and the hands of the thin guy needed to be moved down…
-STEP 04: I fixed the things that were wrong in the last step, tried to find more things to correct and got the red pencil to add the secondary elements.
-STEP 05: I finished with black pencil… I didn’ t like the results, specially of the thin guy… his expression was so funny in the picture, and it got very boring in my drawing (SHAME) . It is very hard to draw doing this bunch of analisis.. usually I do a mental analysis, but don’t think this much about what I am doing. I will do the caricature… more freely now and see what happens.
I know, I should have done an analysis of the design first before launching into drawing, but could not resist. Anyway while drawing (step by step, level by level) I was doing an analysis in my head.
Maybe I wanted to give myself a break with Toby Tortoise.
We should see real hair bear to draw the hair on Kaspar? I mean, it would help?
Hey, everyone. I bring you another Eisenberg study.
I wanted to try something a little different here. Instead of actually copying the entire drawing down with 100% accuracy, I wanted to make my copy seem a bit better than the original, which was the key thing for me to remember as I did my version.
Eisenberg is a true genius of cartooning and I don't want to make it seem as if I'm a better drawer than he is, which I'm totally not, but I felt like I could top his drawing a little by fixing a couple of subtle things. They're pretty much just different placements of objects in certain specific positions that would make the entire drawing read more clear.
I jotted those changes I wanted to make down on my paper:
1. I wanted to make the cowboy seem more proud that he's riding Mr. Jinx than how he's originally portrayed. He seems pretty happy that he was able to ride a cat, with him being a mouse and all, so I really wanted to make that stand out.
2. Make Pixie and Dixie's head less cramped together. Eisenberg, I'd imagine, had to do it like that in order for the other cat's word bubble to appear in the panel, but since I was excluding the word bubbles in my copy I figured I'd make both there heads seem less cramped together so that they both read clearer.
3. Adding more of of a curve to Mr. Jinx's line of action so that his pose had a bit more life into it. I also figured that that would add to more to the cowboy mouse's proudness.
Here's how I did the step by step procedure:
First I put down the general forms. All the characters together create one big shape. The chair was made into another.
I also added the lines that shape the wall and the floor and the two cats' line of action were added. I checked them in PS and fixed the proportions
I then added the general construction of all the characters, but I still kept in mind of all the little subtle changes I wanted to make.
The muzzles, ears, hat, tail, arms, legs, hands, feet and fur of both cats are sub forms for their general construction.
I fixed my proportions and made the drawing a bit more tighter. I also added more details to the chair and mice
I put both saddles and straps on the two cats and added Mr. Jinx's bow tie.
Here I raised Mr. Jinx's bum more up so that his line of action could curve more and moved Pixie's head a slightly bit to the right from Dixie's.
I elongated the cowboy mouse's body to add more to his pride and tilted his head a little upward.
I still kept in mind that the construction and placement of the objects that weren't changed had to be accurate to the original and that the things that I changed had to fit with the construction of the characters in the original, except for the elongation I added to the cowboy mouses torso.
I fixed what I needed fixing and added the final details to the cats like eyes, nose, muzzle, fur, tie, ears, hands and feet. I forgot the other cats tail in this one.
I added arms and legs to all the mice.
fixed proportions
I notice when I finish a drawing that perspective is one of my biggest flaws.
As I kept building each character in my Eisenberg copy I noticed how Eisenberg doesn't keep the perspective on certain objects constrained. Well he does, but not by normal perspective standards. It's cartoon perspective, but with control. He knows how each object and character is rounded according to both real life perspective and cartoon perspective.
That's how I see it at least.
I build more details to all the mice as I continue to fix certain things.
I noticed Dixie's head is a lot more angular and Pixie's is more circular. That helps me realize that they don't look exactly alike. There are subtle differences in there head shapes (and eye shapes) that makes them seem more different from one another so they won't look like exact copies of each other.
And here's the final piece. I was able to arch more Mr. Jinx's line of action, show more pride in the cowboy mouse, and get rid of the cramped space between Pixie and Dixie's head.
I changed eye directions for both Pixie and Dixie so that one is looking directly at the cowboy and the other is looking directly at the saddle on Mr. Jinx.
I feel like everything now seems more clear while it still retains the same feel that the original gives.
There are, of course, some little mistakes in proportion like Pixie's head being little bit squashed on the right side as well as Dixie's, but other than that I think it came out fine.
Tell me what you think! I f you didn't understand something let me know and feel free to critique this.
I think I'm going to do a much more harder drawing for the next one. One with a good sense of perspective.
- The characters are more separated and some negative spaces have been changed. Is that good? - I think my "more looser version" needs more life in it, push farther the atittudes, make a caricature of them. -Im happy with some forms, I think some of them feel solid... or more solid than previous versions
- I didn't make a good observation first. The feather-necklace is very bad situated. - In the hip, the small wing that is seen, must go more out, I must have put more attention in the negative space inside. -The back of the shell of the turtle is smaller. It is more hiden. - Have to fix the hair of the girl.
3.- 3rd Level of Forms - 2nd attempt
- The feather-necklace is better, I have to show better the form in the arm that is closer to us. - Now the arm that rests on the hip is smaller! I have fix it. - The little eye in the girl is bad situated. - I believe that the bases of the drawing are destroyed by every arrangement. The head of the turtle is very small now, I have to fix it. - the hair of the girl must follow the perspective and form of the head, like the eyes. - I destroyed the form of the hole where the turtle shows the head. -I must raise a little more the peak of the girl.
3.- 3rd Level of Forms - 3rd attempt
-now I made the damned head of the turtle too big! -I have to put better the poscicion of the hair of the girl -I have to make better the shape of the hole in the turtle.
3.- 3rd Level of Forms - 4th attempt
-I still have problems with the form of the necklace. The necklace must not exist by himself, must emphasize the form of the breast.
4.- 4th Level of Forms - 1st attempt
Man I felt fear putting the details! I didn't want to destroy the forms. I must have to draw the feathers? am I right?
Phew! very hard drawing! goddamned Disney artists!
 better?